


How to Get Google Search Console on Your Brighter Vision Website
Google Search Console, previously known as Google Webmaster Tools, is another free tool that gives you even more information about your website and who is visiting it. It’s really the best way to know exactly how Google views your site straight from the horse’s mouth!
Google Analytics and Google Search Console might seem like they offer the same information, but these two tools also have some very distinct differences.
Let’s clear this up right off the bat:
Google Analytics is more about who is visiting your site. This tool provides you with data such as:
- the total number of visitors
- which sources are bringing traffic to your site
- the amount of time visitors are spending on your site
- where your visitors are geographically located
Google Search Console focuses more on the internal information. This tool provides information such as:
- which of your site’s pages are included in the Google “index”
- which sites are linking to yours
- how Google’s bots actually “read” the information on your web pages
- which specific queries your site is appearing for in Google’s search results
These two tools truly do work best hand-in-hand. By using both Google Analytics and Google Search Console, you will have a more complete picture of all of your website’s traffic.
Looking for more super-charged marketing tips?
Sign up for our e-course on 8 Unconventional Ways
to Market Your Private Practice!
In this article, we’ll walk you through the primary steps to sign up for Google Search Console and connect it to your Brighter Vision website.
Then we’ll turn our focus to your Google Search Console account and talk about how to use a couple of our favorite features.
How to Sign up for Google Search Console

Step 1. Sign in to (or sign up for) your Google account
To sign up for Google Search Console, you’ll first need to be logged in to a Google account.
If you’ve already signed up for any other Google product – i.e. Google My Business, Google Analytics, Gmail, etc. – then you already have a Google account. If you do already have an existing Google account, it is best to use the same account so that all of your business accounts are connected. This helps Google better understand your business as a whole and will, therefore, help your SEO.
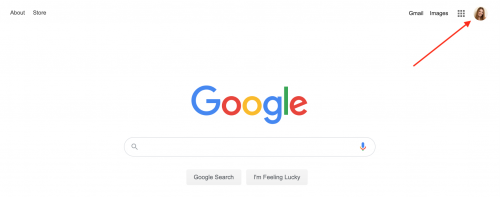
You can check to see if you’re already logged in to a Google account by going to google.com and looking in the upper-righthand corner. If you are already logged in, you’ll see an image (or colored bubble with a couple of letters) in this corner:
If you’re not already logged in, you’ll see a blue Sign In button, as shown here:
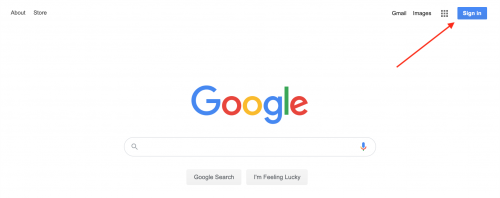
If you’re seeing this button, you’ll need to log in to your Google account before you can continue.
If you do not already have a Google account, you can create one here: https://accounts.google.com/SignUp
2. Sign up for Google Search Console
While signed in to your Google account, navigate to this link: https://www.google.com/webmasters/tools/ and you will be taken to a Welcome screen that looks like this:

Next, open up a new tab in your web browser and open your website in that tab. Once it has fully loaded, highlight the full domain in your browser’s address bar, and right-click on your mouse to copy this entire line (including the https://) of the URL.

Go back to the tab that you have the Search Console’s dashboard open and paste that full URL into the text box, then click the red Add A Property button, as shown here:

3. Verify Site Ownership
Next, you will be taken to a screen that gives you a few different options to confirm that you own the website.
By default, you will be on a tab labeled Recommended method, but if you click on the tab labeled Alternate methods you will see more options and this is where we’re going to be working from:

Option A:
If you’ve already signed up for Google Analytics and you’re still logged into the same Google account, simply choose the Google Analytics radio button and click the red Verify button to let Google do all the work for you.
Option B:
If you have not signed up with Google Analytics yet, you can accomplish the same thing (with a couple of extra steps) by choosing the HTML tag radio button and clicking the red Verify button.
You will then be shown a line of code that needs to be added to the back end of your website. It will look something like this:

The last signup step will be to get this code added to your private practice website.
If you’re a Brighter Vision customer, we would be happy to handle this step for you!
Highlight and copy the full line of text given in the text box (beginning with <meta and ending with />) and email it to our Support Team at [email protected] so that we can get it added to your website.
Leave this browser tab open and do not click the final Verify link until you hear back from a member of our Support Team that the code has been added.
Once it has, then you can click the final Verify button and you’re ready to start using this tool!
Important Note: if you skip this step and you do not add this code to your website, your Google Search Console account will not be able to collect any data and you’ll never see any information in your Google Search Console dashboard.
If you’re not a Brighter Vision client or if would prefer to install the code yourself, you can follow these steps:
1. Log in to your website’s WordPress dashboard
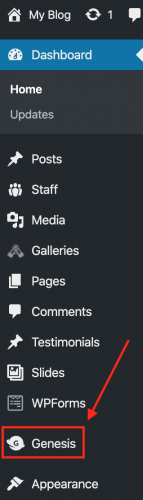
2. Click on the Genesis tab in the menu on the left-hand side of your dashboard
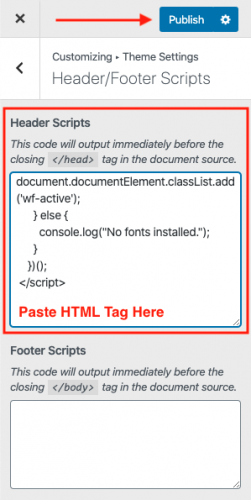
3. Click on Header/Footer Scripts in the Customizer

4. In the upper text box under Header Scripts, scroll to the bottom and hit Return a few times to give yourself a couple of blank lines. Paste the full HTML Tag from your Google Search Console account and click the blue Publish button at the top of the Customizer.
If you’ve pasted this code to the correct place on your website, you should start to see data populating to your Google Search Console account within a few days.
How to use Google Search Console
Once again, it is important to keep in mind that data takes time to collect, so it may be a few days before your new account has data worth looking at.
In the meantime, this is an excellent time to take care of your first SEO task:
1. Submit a sitemap to Google
Submitting your sitemap is the easiest way to tell Google, “Here is my website and everything you want to know about it. Please add it to your search results pages soon!”
Although Google’s bots will eventually find your new website on their own, without submitting a sitemap this process of getting your web pages added to the Google index is much longer.
The good news is your Brighter Vision website already has a sitemap that was created for you, so submitting it to Google is a breeze!
All that you will need to do is expand the Crawl tab in the toolbar on the left side of your Search Console dashboard and click on Sitemaps. Then, you should see a button labeled Add/Test Sitemap in the upper righthand corner of your screen that looks like this:

Clicking this button will bring up a pop-up box with your website’s domain followed by a text box. Enter the text sitemap_index.xml into the text box, as shown here:

… and click on the blue Submit button. Congratulations, you have now submitted your sitemap!
2. Check your website’s search performance
Among the dozens of powerful features set up for Google Search Console, we have to highlight one in particular: the Search Analytics report.
This report will give you answers to questions like:
- What is the strongest web page on my entire site?
- Which one of my web pages get the most traffic and/or conversions?
- What are the specific keywords that are sending visitors to my site?
- What path do people take as they navigate through my site?
- Which of my web pages do visitors most often leave from?
You can find all this (and more) by expanding the Search Traffic tab and clicking on Search Analytics as shown here:

Keep Learning
To learn more about getting started with Google Search Console, check out this article from Yoast SEO: The beginner’s guide to Google Search Console
SEO Made Simple
Do you find the Google Search Console dashboard a bit too confusing?
Do you find yourself spending too much time logging in to all of your Google accounts separately to monitor all of your website data?
Well, we’ve created a solution that we just know you’re going to love!

Brighter Insights is an easy to use, all-in-one SEO & online marketing solution for therapists.
With the Brighter Insights dashboard, you can monitor and measure the SEO performance of your entire web presence; from your website to email marketing campaigns to social media accounts, to paid advertising and more!
Understand your data like never before with a beautifully interactive & user-friendly dashboard that you can easily navigate with the click of your mouse.
Learn more about all the features of this new tool and sign up for a free trial here: Brighter Insights: Your All-In-One Marketing Platform
Want the beautiful therapist website you deserve? Then you’re in the perfect place.
Brighter Vision is the ultimate marketing package for therapists, centered around the best therapist website you’ve ever had. Fill out the form below to learn more about our team of professionals who can’t wait to help your practice grow like never before 🙂