


How to Make Videos for Your Practice Website
 You may have been tempted to make a “welcome” or biographical video for your practice website before, but you didn’t know where to start.
Would making a video really be worth all the time and effort? What if it’s too hard?
Well, I’ve got three pieces of good news for you.
First of all, creating a video for your site isn’t that hard, especially for someone as smart as you. (That’s not just flattery – we know what it takes to earn those degrees!)
Using Youtube to upload your video files is not only free, but it’s easy too! (Don’t worry, we’ll get into that later.) And as you’ll see in many of our examples, an excellent practice website video doesn’t need a lot of fancy editing with complicated software. Chances are you could get the whole video project done comfortably in an afternoon.
Secondly, yes – a video would definitely be worth the effort! As a clinician, using video of yourself on your website offers your potential clients an incredibly valuable opportunity: they get to “meet” you face-to-face before ever actually meeting you in person.
Remember: even though this is may be a “welcome” video that welcomes your visitor to your homepage or About Me page, your video’s real purpose is to introduce that potential client to you.
In this way video can form a powerful, instant connection with your website visitors and help you stand out from the crowd. Not to mention, I’m sure you can imagine the benefit of clients coming through your door already knowing whether or not they’re going to connect with you.
Lastly, the final good news is that you’re in the right place to learn everything you need to shoot a wonderful video for your practice website!
–> PSST! Want your marketing to really stand out? <–
Try our course on 8 Creative Practice Marketing Tips!
How to Make a Video for Your Practice Website
Step 1 – Find Your Camera
One of the best things about smartphones being so ubiquitous nowadays is that means everybody and their mother already has a high-quality camera in their pocket.
If you have a professional or HD camera of your own that you’d rather use, fantastic! But if not, you should know that your smartphone will more than get the job done as your video recorder.
Step 2 – Set Up A Good Shot
We’ve all seen badly shot videos on the web, so I know you understand that kind of frustration as a viewer. It’s unfortunate but definitely true that little mistakes – especially technical ones – can distract from what would otherwise be an excellent video.
One of the most important technical aspects to pay attention to when you want to set your video up for maximum success is the way you’ve set up your shot, or frame. Here are some important rules to follow when examining your setup.
1 • Show yourself talking.
Since we know the main point of using a video on your practice site is so your potential clients can virtually “meet” you face-to-face before they actually meet you in person, you’ll understand why it’s important to actually show yourself and your face talking directly to the viewer.
It’s simply more difficult to make an emotional connection with your ideal clients when you’re only a disembodied voice. Really target your dream clients by showing off both your voice and your smile.
–> Need help nailing down your ideal client? <–
Try our FREE Ideal Client Quiz!
This cautionary tale of a video from Thrive Counseling shows us how ineffective a practice website video becomes when you take out the personal touch entirely:
As potential clients, we’re instead left with no idea of whether or not these therapists would be a good fit for us because we haven’t learned anything new about them.
2 • Stay close – but not too close.
Here’s something that will help both you and your viewers enjoy your video more: you only need to sit far enough away from the camera to show your head and shoulders area (like a statue bust).
Sitting too far away from the camera to show more of your body (or the whole thing) will only serve to make everyone feel awkward. You will feel less comfortable because you’ll be conscious that more of your body is on camera, and your viewer will feel less comfortable because the distance between you and the camera will make the video feel more formal and less personal or intimate.
For a quick example of a well constructed video shot, let’s go to this video by Jack Jacobsen from Cooperative Therapy:
3 • No vertical filming!
This is a simple tip, but it’s important enough to earn its own section. Never film your videos vertically! What do I mean by a “vertical” shot compared to one that is not?
Let’s take a look at this video by Shakeeta Torres from EmPowered2Shift Counseling & Coaching Services to see a vertical shot in action:
For example, this video by Shakeeta has wonderful content if you take the time to sit and listen to what she’s saying. The problem is that much fewer viewers are going to continue on that far when their first impression of the video is “unprofessional.”
Step 3 – Practice Ahead of Time
By no means do you need to memorize anything word-for-word (in fact, it’s best if you don’t), but it is still important to plan a roadmap for what you’re going to say in your video. To make sure you’re not over-preparing, try writing out your plan for your video topics in bullet point format instead of as an exact script.
The sweet spot of preparation you’re looking for is having confidence and comfort with where your conversation is headed, making you come off as more natural and welcoming on camera – but not so prepared that you start to sound like a robot.
This video by Diana Luke from Clinical Therapist Sheffield is a great example of that sweet spot:
Step 4 – Shoot Your Video
If you aren’t used to shooting videos of yourself, you may be feeling a few jitters right now but you can do it!
Don’t be afraid to make mistakes – every time you stumble over a word or pause a little longer than you’d like, keep going and remember that those little hiccups just means you’ll be even better on the next runthrough.
Step 5 – Post Your Video
The great news is that this is possibly the easiest step of all!
Once you’re done making your video, locate the video file on your phone or computer. Then open up a web browser and go to Youtube.com/Upload.
You should see a screen that looks similar to this one:
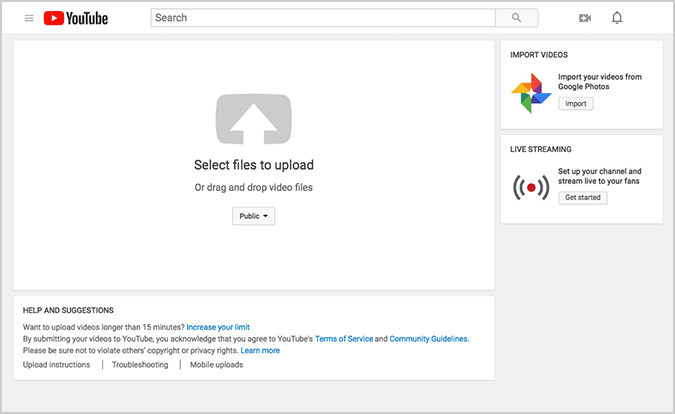
Either click on the upward arrow icon to select your video file manually, or simply drag the file with your mouse onto that space in the Youtube window to successfully upload your video.
Step 6 – Celebrate!
You did it, you made a video for your practice website!
You can use the link that Youtube assigns your video to help post it onto your practice website, but if you’re a Brighter Vision customer our support team would be happy to do that part for you. 🙂
Give your practice the very best and try out the world’s leading therapist website service, Brighter Vision.
(Step 1A – Hire)
Wait. Why are we back at Step 1? Well, if you read all of this and decide that making a video yourself for your private practice isn’t exactly your cup of tea, then you should certainly hire an expert.
At Brighter Vision, we partner with Ernesto Segismundo from FYLMIT.com. Be sure to check out his work and let him know that Brighter Vision recommended you to him :).
Reach out to our customer happiness team today and learn how one of our custom-built websites can help you grow the practice of your dreams.