


8 Steps to Prepare for Your First Telehealth Session (+ Free Checklist)
With all of the major changes you’ve had to make in the past couple of years, you may be feeling like you were rushed into providing telehealth sessions.
We get it! It’s a huge change.
In times like these, client care is more critical than ever and the last thing you want is to come off as uncomfortable or unprepared for your first online therapy session.
That’s why we’ve put together this step-by-step telehealth preparation checklist to ensure you’re set up for a flawless first session.
Want to skip straight to the good stuff
& download your free checklist? Jump to the Checklist
8 Steps to Prepare for Your First Telehealth Session

Step 1. Choose a Platform to Host Your Telehealth Sessions
This first step is fairly obvious – you’re going to need to sign up for a telehealth platform in order to hold online therapy sessions.
Since being deemed a global pandemic and a nationwide public health emergency, the U.S. Department of Health and Human Services (HHS) issued a statement that healthcare providers may temporarily use any technology available to provide telehealth services during COVID-19, whether it is HIPAA-compliant or not. It is important to remember that this will only be temporary and we highly recommend finding a HIPAA-compliant solution if you plan to provide teletherapy services long-term.
While Brighter Vision does not have its own dedicated telehealth platform, we’re more than happy to help integrate your website with the platform of your choice. That being said, we cannot endorse one platform over another.
However, we can provide you with this list of HIPAA-compliant options to consider (and some great deals exclusively for Brighter Vision clients to go along with them):
- TheraNest – Get 20% off your first 3 months when you sign up here
- Doxy.me – Check out their free plan here, or get $10 off a month for 12 months of any paid subscription with coupon code BVdiscount
Step 2. Contact Your Insurance Panels
Most major insurers are willing to pay for telehealth, but it’s a good idea to call all of the companies you’re currently working with to double-check. Make sure you understand their reimbursement policy in full and all of their requirements before your first session.
Some insurers may require a specific code modifier when submitting a telehealth claim. Some have very detailed documentation requirements.
There’s nothing worse than finding out after-the-fact that your claim was denied for something that could’ve easily been submitted correctly the first time. Save yourself time (and money) by familiarizing yourself with all of the requirements for all insurance panels you’re on before your first session.
Step 3. Obtain Client Consent
Before your first session, you’ll also need to determine what your state’s policy is regarding client consent. You can find a current policy for your state at the Center for Connected Health Policy (CCHP).
Most states do require therapists to obtain some sort of client consent informing them of the possible risks, benefits, and alternatives to telehealth as well as their right to discontinue treatment at any point they choose.
Step 4. Create Your Telehealth Environment
You’re getting so close to being ready to conduct your first telehealth session! But just like you had a dedicated space for your in-office therapy sessions, you should make sure you’ve got the same type of dedicated space for your online sessions.
First and foremost, choose a quiet and private space to use for your telehealth sessions so that you’re in compliance with HIPAA. You want to make sure this space is also free of distractions such as clutter, pets, or your cell phone (unless that’s what you’re using to conduct your session).
If you’re planning on providing telehealth services long-term, you may want to consider designing a dedicated office space that is optimized for video therapy. When designing this dedicated space, here are a few tips to keep in mind:
- Choose a neutral wall color such as a light blue or gray and use a flat (non-glossy) paint to avoid reflections. Sitting in front of a wall that is too light or too dark can cause your computer’s camera to auto-adjust and show your face too dark or washed out.
- If your space has natural light, make sure your light source is in front of your face and not behind you.
- Pay special attention to furniture and décor placement in regard to the room’s acoustics. Placing area rugs on hard floors, hanging pictures on the walls, and evenly spreading out furniture throughout the room will greatly reduce echoing.
- Make sure you have a dedicated spot for your computer and don’t change this from one client to another. Doing this will minimize unexpected sound or lighting changes.
- Consider hanging a “Do Not Disturb” sign on the outside of the door to avoid any interruptions during sessions.
Step 5. Get Your Technology Ready
In order to conduct your first teletherapy session, you’re going to need a computer or smartphone with an integrated camera and a strong internet connection.
We also recommend using a headset with a microphone instead of your computer’s built-in speakers/microphone. This will significantly reduce echo and mic cutouts on both ends when you inevitably speak at the same time.
Try to remember to completely shut down your computer at the end of each workday, or to restart it every morning, to keep it running as effectively as possible.
Prior to every appointment, it’s also a good idea to:
- Check to make sure your software and operating system are up-to-date and run updates when available.
- Exit out of any background programs and applications that aren’t needed for your session. This will ensure that your telehealth platform receives the majority of your computer’s resources and internet bandwidth.
- Check that you’ve granted access to your computer’s camera and audio.
Step 6. Check Your Internet Connection
Once you’ve collected and prepared your technology, it’s time to check your internet connectivity. A strong, reliable internet connection is integral to a telehealth session and if you’re able to use a wired connection, this will provide you with the best possible experience through your internet provider.
If you’re not able to use a wired connection, you can still use a wireless network for your online sessions. However, you’ll want to be sure that you’re using Wi-Fi with a bandwidth (speed) of at least 10 MBPS on download and upload. If your bandwidth is any slower, your video will lag and cut out causing a negative experience for both you and your clients.
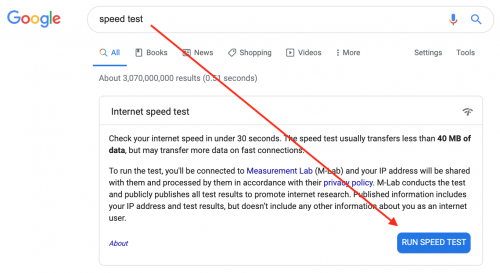
To check your internet speed, type “speed test” into a Google search and click this button:
This will run short tests for both your download and upload speeds, which will take about 30 seconds overall. When complete, you’ll be shown your results:
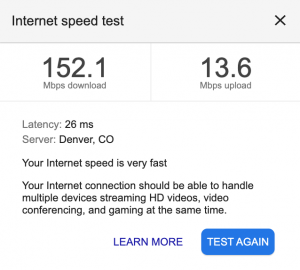
If either of your tests returns a speed lower than 10 Mbps, contact your ISP to ask about available options to improve your connection. This will likely require upgrading your service to a higher-level package but will definitely be worth it in the long run.
Step 7. Do a Test Run Before Your First Teletherapy Session
Before your first session, find someone who’s willing to do a test run with you. Ask a friend or family member if they have a little spare time to run through a test session with you.
Log into your telehealth platform, start a new session and send them the link to join. Once you’re both inside the online room, check that the sound and video quality are clear in both directions. Then, run through all of the other features you’ll actually be using with your clients during their sessions, such as a live chat or screen sharing.
Doing this a few times and learning what to expect will make you much more confident and prepared for your first real session.
Step 8. Download the Telehealth Preparation Checklist
Ready to start preparing for your first telehealth session? Great!
Download a free copy of our telehealth preparation checking to keep on hand while you’re getting ready for your first session:
Want the beautiful therapist website you deserve? Then you’re in the perfect place.
Brighter Vision is the ultimate marketing package for therapists, centered around the best therapist website you’ve ever had. Fill out the form below to learn more about our team of professionals who can’t wait to help your practice grow like never before 🙂