


BRIGHT BITE: How to Edit Photos Online for Your Website


It may seem like the safest plan is to always use the largest resolution photo you can find for your website, but unfortunately that’s not true. When you use oversized photos on your site, you’re putting a heavy burden on your website. Pages with oversized photos will load more slowly and could start to negatively affect your site traffic.
In order to avoid slowing down your site, it’s important to learn how to resize your photos properly. Luckily, there’s a great tool we love to recommend called Canva that allows you to do this quickly and easily right inside your Internet browser.
For our example, we’re going to be using this photo of a studious dog.
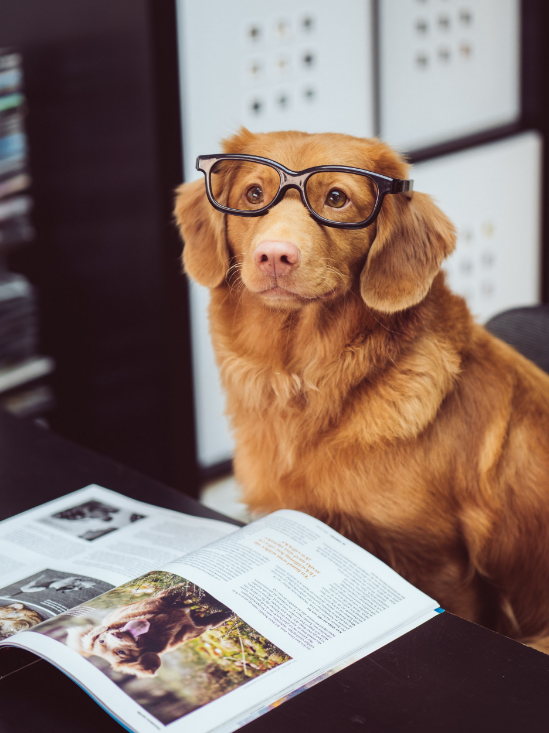
This image is the final product after we resized the dog photo to fit into this blog post. However, the original photo has a resolution of 1876×2501, which is way too big. Let’s go through a few easy steps to show you how we used Canva to resize our photo to the size we needed.
How to Edit Photos Online for Free Using Canva
To open up Canva’s free online photo editor, click here. You can either click & drag your image file directly onto the page to upload it to the site, or you can simply click the green “Upload” button to select the image from your files.
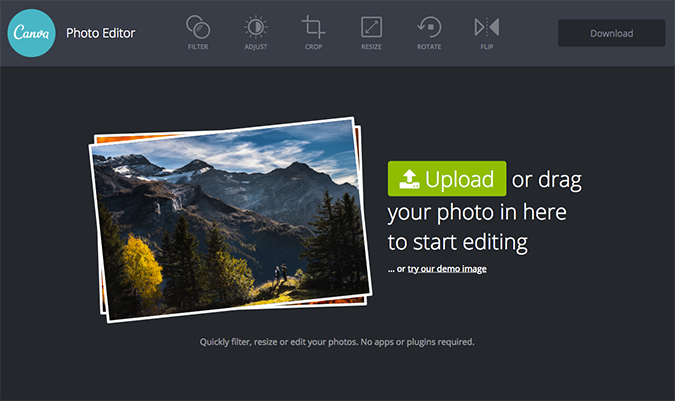
This next screen is the actual photo editor where you’ll make any edits you’d like to your image. As you can see from the main menu items at the top of the screen, there are a lot of different ways you can edit your photo for free, from adding a filter to adjusting the contrast. Feel free to play around with these, but for right now we’re going to be focusing on the “RESIZE” functionality.
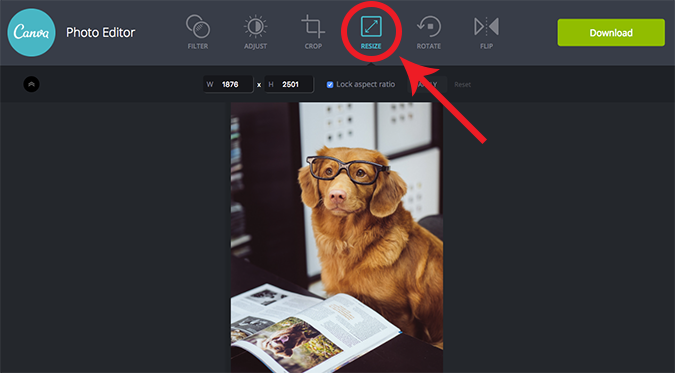
In this close-up, you can see that the resolution of the photo we uploaded is still very large.
I know that in order to fit the photo into this blog, I want to resize the photo to a maximum width of 550 pixels. To do that, I’m simply going to type in a new width for the photo.
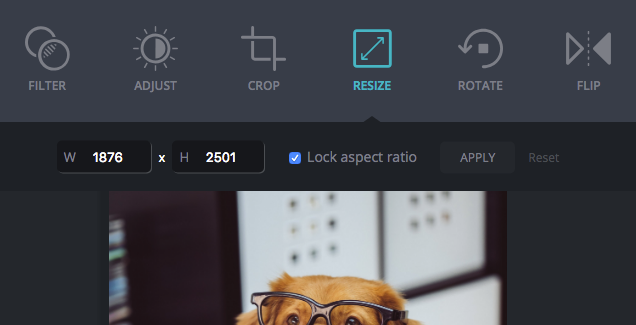
HOT TIP! – As long as you have the “Lock aspect ratio” box checked (like it is in these photos), Canva will automatically adjust the other measurement to keep your photo from stretching. So if you only put in the width, Canva will automatically determine the right height.
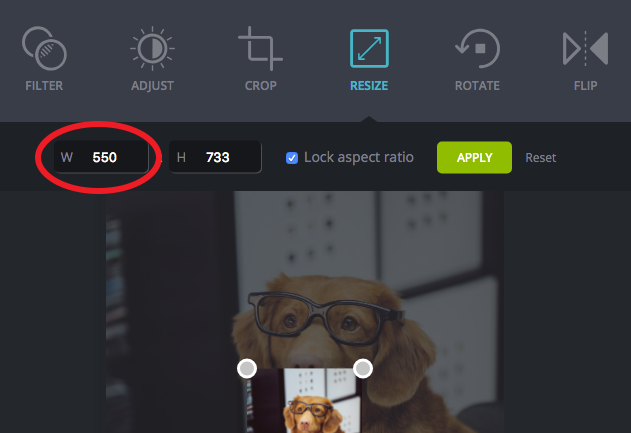
After you’re done typing in the new resolution size for your image, click the green “APPLY” button to the right to save your changes.
Now that we’re done editing our photo, we need to get the new image off of Canva and onto our computer! Luckily that’s as quick as clicking the green “Download” button in the upper right-hand corner of the page.
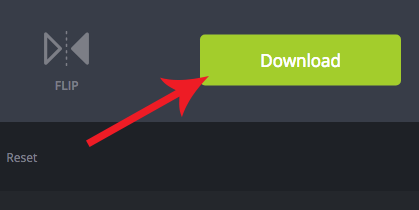
Click the “Download your photo by itself” link on the pop-up that appears, and your photo file will automatically start downloading to your computer.
Still looking for a little help with your therapist website?
Become part of the Brighter Vision family and receive 100% FREE website support & assistance for life!
Fill out the form below to have one of our customer happiness agents reach out directly with more information. 🙂